Solid Wood Brown Polyurethane Dining Chairs Set Of 2
When presented with a problem I like to find a simple, inexpensive, effective and often novel or innovative solution.
A Gift From a Friend
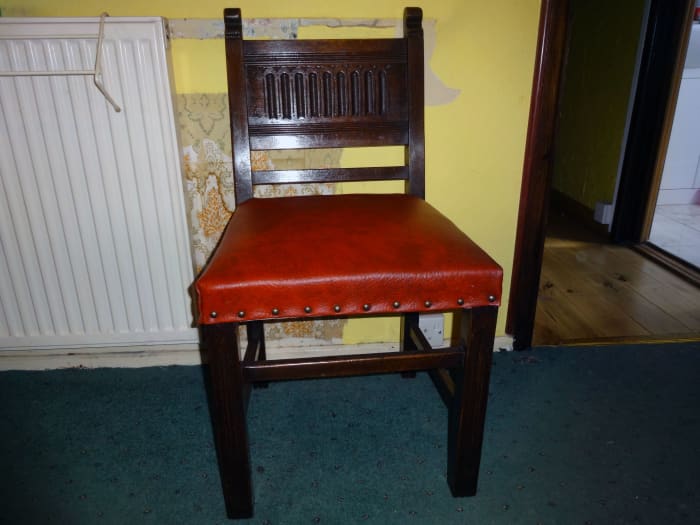
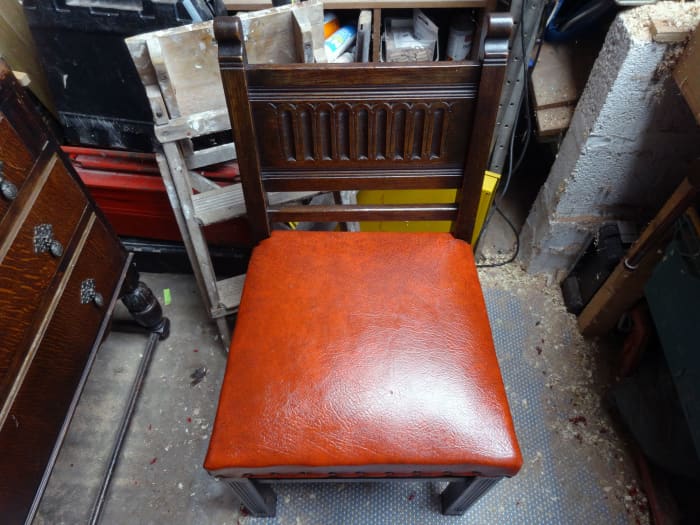
A friend of ours who's a keen DIY enthusiast picked up a set of rather scruffy but very ornate solid oak dining chairs cheaply from a junk shop with the intention of renovating them himself.
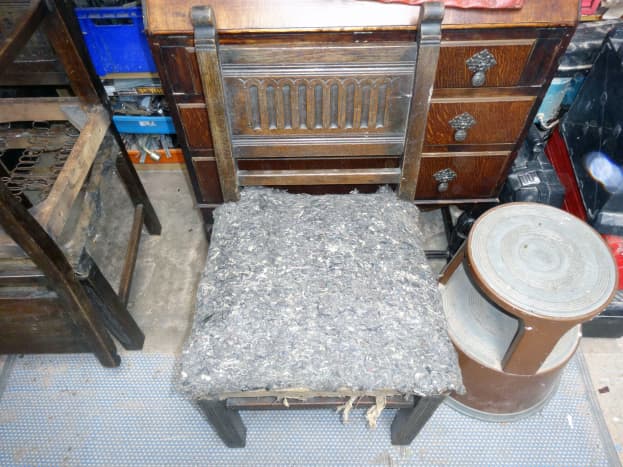
He got as far as stripping one chair down to the bare springs with the intention of replacing the springs with a plywood seat, cushioned with foam and reupholstering with material rather than the existing red leather.
However, on realising what a big task it was, and the time it would take, he offered to give the chairs to me knowing that I would make a good job of it and make good use of the chairs; a gift that I couldn't refuse.
Musical Chairs
It's not as if we needed more dining chairs; we already have a plethora dotted around our home and in the shed.
When we were first married we bought a set of cheap modern dining chairs, and over the years replaced them with older, better quality ones that were acquired and inherited.
Therefore, after renovating these chairs we will get rid of some of our existing chairs, and move others around the home.
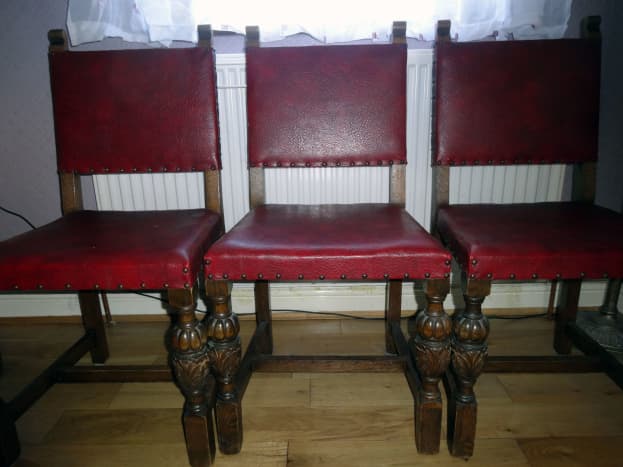
Four ornate chairs in our dining room which were surplus to the needs of the local university's Chaplaincy.
Assessing the Extent of Renovation Required
Having got the chairs home from our friend, the first thing was to give them a good inspection and itemise what needed doing to renovate them.
If our friend hadn't stripped one of the chairs back to the bare springs, apart from replacing the missing stretcher to one of the chairs, and regluing the legs and back supports, I might have been tempted to have just given them a good clean and polish.
On the initial visual inspection, apart from the legs and back needing regluing and the need to replace the missing stretcher on one chair, there wasn't much wrong with them other than the leather and wood needing a good clean and polish.
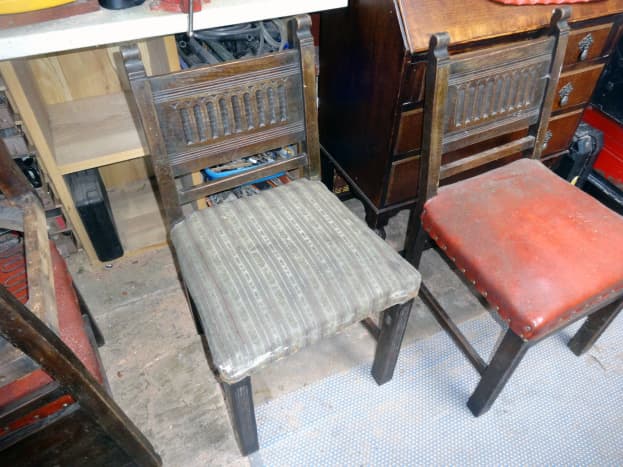
However, as one chair was already stripped down it seemed logical to strip the other three down to the bare wood and reupholster all four. Fortunately, our friend had kept the leather seat from the one chair he'd stripped, so I'd be able to reuse the original leather.
Although not obvious on the initial visual inspection, I was later grateful for being forced to strip the other three chairs down, because in doing so I discovered one dislodged spring and one broken spring; both of which had to be rectified before reupholstering.
In renovating the chairs I had a choice between sanding them down to the bare wood and re-staining, to make them look as good as new, or just giving the wood a good clean and polish to retain some of the patina. I opted for the latter because we like the look of old furniture, and a bit of patina helps to show its age.
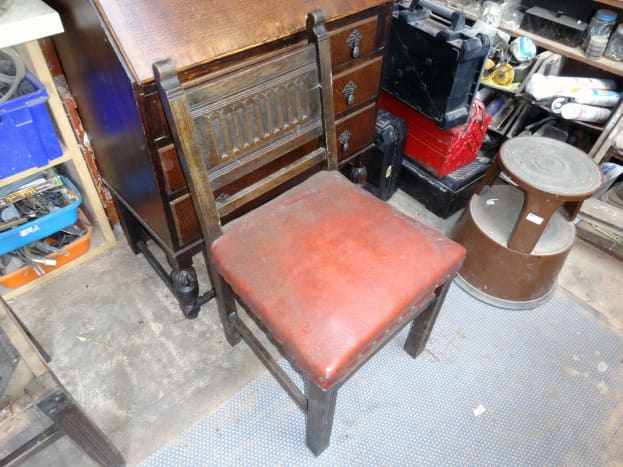
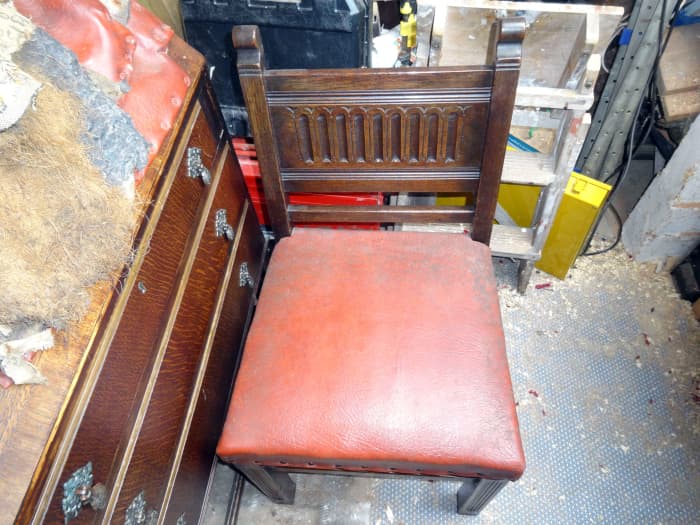
One of the four chairs waiting to be renovated.
Step-by-Step Guide to Renovation
Below is an overview of each step of the renovation I made, along with the issues I uncovered and how I resolve them, including my repair to a broken spring and replacing the missing stretcher.
The basic steps being:-
- Remove all the upholstery.
- Repair any damage to the chairs, including regluing the legs and back.
- Clean and polish the wood.
- Reupholster the chairs, and
- Clean and polish the leather seats.
Also, revealed during the process of renovation was the uncovering of the chair's history and manufacturer, giving the chairs some provenance.
#1 Removing the Red Leather Seats
To remove the leather seats required removing all the upholstery tacks. The proper tool for doing this is the 'draper tack lifter; but a suitable screwdriver and needle-nose pliers can be just as effective, albeit it will take a little longer.
There's no point in rushing, as if you intend to reuse the leather cover you don't want to tear or damage it.
Read More From Dengarden
Using a long sturdy screwdriver with a thin flat head, gently prise it under the upholstery and twist the screwdriver slightly so as to raise the head of the tack slightly. The whole tack may then just pop out, or if it doesn't just gently pull it out with the pliers.

Using pliers and screwdriver to remove the upholstery tacks.
#2 Peeling Back the Layers
In removing the leather, it quickly became obvious that this was not the original seat covering. Not only had the seats been previously upholstered, but as I took off each layer of upholstery I discovered another layer underneath, until after the fourth layer I eventually reached the original padding.
The four layers of upholstery, in chronologically order from most recent to oldest being:
- Red leather (as the most recent covering).
- A striped pattern, with small flowers.
- Large flowers on a golden background.
- Large diamond flowery pattern (the original upholstery).
On removing the leather seat cover, to reveal the previous covering.
Provenance
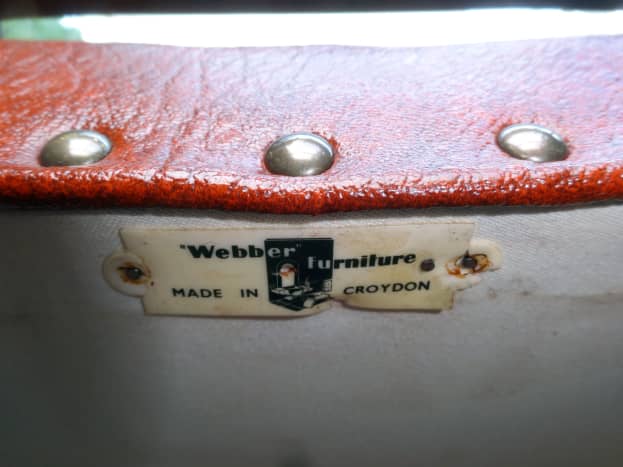
As I was peeling back the layers, I came across the manufacturer's label:
'Webber Furniture, Made in Croydon'
On looking on their website, they are a family-owned business in Croydon, England, which has specialised in finely made oak furniture since 1919.
They still make the same design chair to this day as the one I've renovated here. So the chairs could be anything up to 100 years, and although it's difficult to know their exact age, considering how many times they've been reupholstered it would suggest they're quite old.
In browsing their website, I noticed that they offer a full restoration service of their old furniture; which if you had the money and wanted an authentic restoration rather than a renovation (as I've done) then it's certainly an option for such quality furniture.
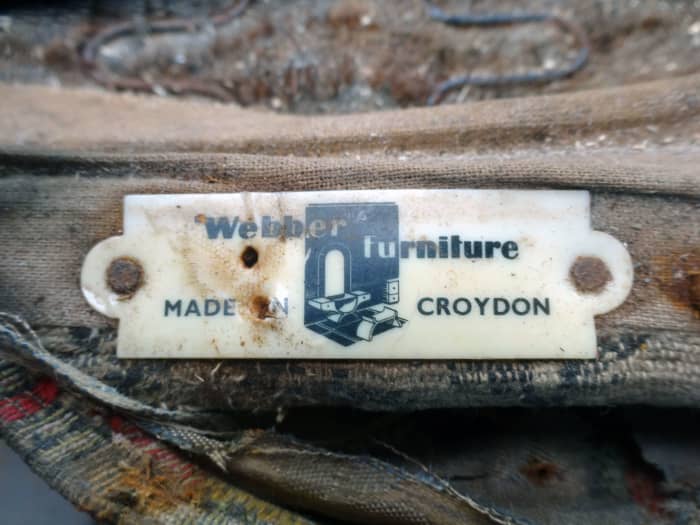
The manufacturer's label revealed as we peeled back the layers.
#3 Removing the Padding and Sacking
There were two layers of padding:-
- Horsehair laid over the sacking and springs; a tough durable material that can withstand the wear and tear from the springs, and
- Wool felt laid on top on top of the horsehair; a softer material that gives comfort to the seat.
The two layers of padding were less than ½ inch thick each, and lifted off quite easily, to reveal the sacking and springs below.
The sacking was so old and worn that once exposed it just pulled away easily, leaving the bare wood of the chairs.
Wool felt, top layer of seat padding, for softness and comfort.
#4 De-nailing
Once all the layers of upholstery were removed, I then used a claw hammer and an old chisel to de-nail the wood; and an old screwdriver to get in underneath the staples, that secured the sacking to the chair, and pulled them out with pliers.
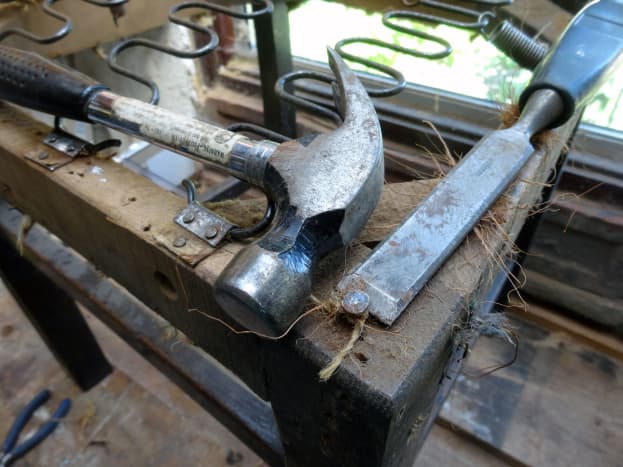
Using an old chisel with a claw hammer to remove all the upholstery nails.
#5 Repairing the Broken Spring
Once I'd removed all the upholstery to reveal the springs, on inspection, one spring had become detached and another had actually snapped.
The detached spring was easy, I just reattached it; but, repairing a broken spring is more challenging; I had visions of scouring the Internet to see if I could resource a replacement.
However, not giving up so easily, I stuck a screwdriver down the centre of the spring (holding it in one hand) while I used pliers in the other hand to see if I could pull the end of the coil out at 90 degrees. Not expecting to succeed because they are strong springs with good recoil; the metal did give and bend the way I wanted it to.
I then gripped the main body of the spring in a metal vice, keeping the coiled body straight with the screwdriver, while I used pliers to bend the end into a loop.
Having repaired the spring, I then reattached it to the chair.
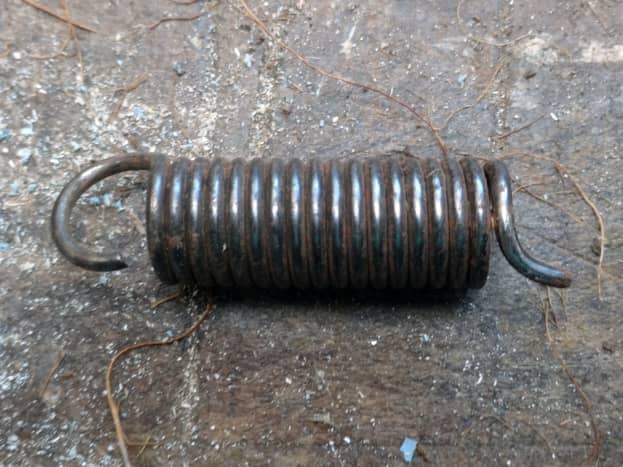
The loop at the end of the coiled spring snapped off.
#6 Making a New Front Stretcher
A stretcher is a horizontal piece of wood between the legs of a chair or table that gives extra rigidity to the legs and therefore lateral strength to the furniture.
As one of the chairs was missing its front stretcher I wanted to fashion a new one to closely match the stretchers on the other chairs.
In searching through my stockpile of scrap and recycled wood in the back of my workshop I found a suitable piece of teak wood that was the right depth; I would have preferred to have used oak or mahogany, but I didn't have any to hand, so I settled for the teak.
Having found the wood to use, I then fashioned it into a stretcher and fitted it as follows:
- Cut it to the correct width, using a bench saw.
- Accurately measure the length of one of the existing front stretchers, and add additional length to allow for tenon joints at each end.
- Cut it to the correct length (including the additional length required for the tenon joints) using a mitre saw.
- Mark out for cutting the tenon joint at both ends; using a square and pencil, and then a mortise and marking gauge.
- Cut the tenon joints with a tenon saw.
- Using the correct width chisel, with a wooden mallet, to cut the mortise in each leg to fit the tenon joint; as I was using the original mortise joint, rather than creating a new one, it was more of a case of just cleaning out the lodged wood from the old mortise joint with the chisel.
- Test fit the joints, and make any minor adjustments, until you get a good tight and perfect fit.
- Round off the edges of the stretcher with an electric sander to closely match the design of the original.
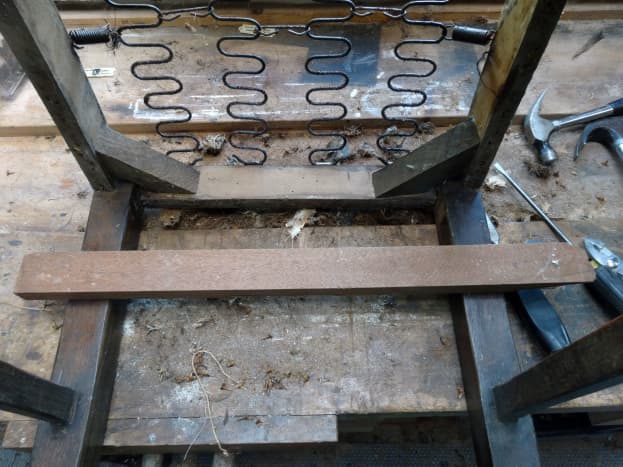
Choosing a suitable piece of scrap wood to make a new front stretcher.
#7 Regluing Legs and Back
Having made a new front stretcher, the next task was to re-glue the loose joints by:
- Using a wooden mallet to gently prise all the loose joints out far enough to get glue into the joints.
- Applying glue generously to all the loose joints in the legs and back.
- Clamping the joints tightly together, using wood spacers between the clamps and wooden chair; so as not to damage the wood, and then
- Leaving overnight for the glue to set hard.
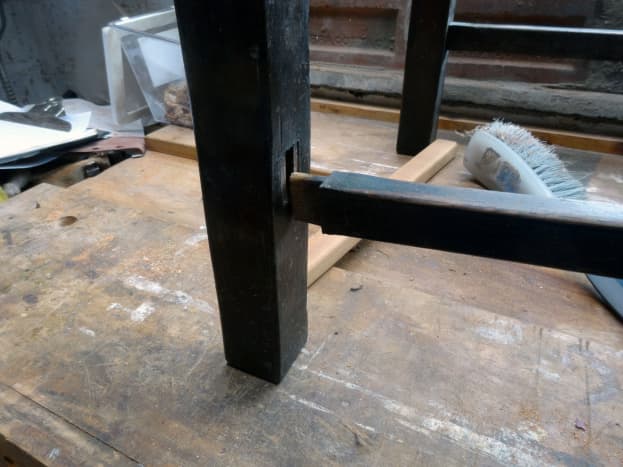
Gently prising the joints apart with a wooden mallet prior to gluing.
#8 Wood Treatment and Valeting
With all the chairs re-glued, before reupholstering, I wanted to give the chairs a good clean, wax and polish; but before doing so, I noticed a few old woodworm holes in one of the chairs, that had been hidden from view by the upholstery.
There wasn't any sign of any recent woodworm activity, and with modern central heating, woodworm isn't the problem it used to be decades ago because the woodworm doesn't like the dry environment of centrally heated homes because it dries out the wood too much for their taste.
Nevertheless, I don't like to take any risks, so before doing anything else I used a paintbrush to give all the chairs a generous application of Complete Wood Treatment.
Then once I'd left the chairs long enough for the liquid to soak into the wood I continued with the cleaning and polishing as follows:
- I washed the chairs, first with vinegar and then white spirit; warm soapy water, or any other cleaning preference you have, would have been just as good. It's just to help get the surface dirt and grime off; while retaining some of the patina to show their age.
- Once the wood was dry, I used a cloth to wipe the chairs over with teak oil, which absorbs into any of the bare wood and enriches it.
- Then once that was dry, I generously applied a coat of dark beeswax polish (containing no silicone) and left it to dry for 15 minutes before buffing up the polish with a yellow duster, to give all the chairs a good sheen.
When polishing furniture I always use beeswax polish as it's long-lasting and gives a good protective surface; and I never use waxes containing silicone because the silicone is an oil that not only evaporates quickly (losing the initial sheen) but also leaves a sticky residue that attracts dust.
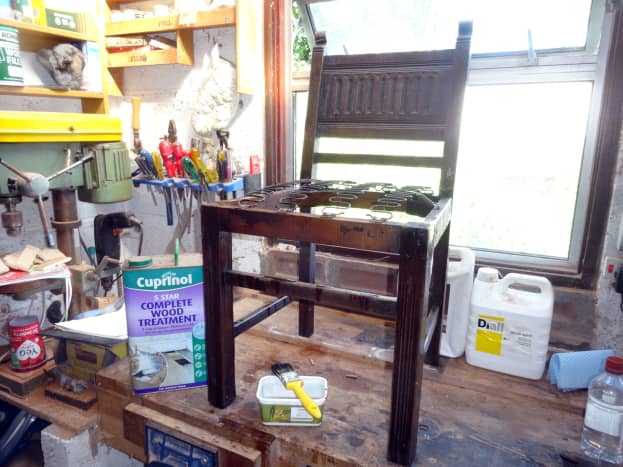
Chairs treated to protect against the unlikely event of woodworm.
#9 Reupholstering
The three basic steps of reupholstering were:-
- Dust sheet (originally sacking)
- The Padding (originally in two layers, horsehair and wool felt)
- Leather seat covering
The original sacking had largely disintegrated, and I didn't have enough horsehair and wool felt as padding for all four chairs because our friend threw that away when he stripped down one of the chairs with the intention of renovating them himself.
If I wanted to I could have bought all that material as new from the Internet to make a faithful restoration of the chairs, but I opted not to for two reasons:-
- I prefer to recycle and upcycle materials when I can, rather than buy new, and I felt that with a bit of innovation I could find alternative suitable materials to make up for the shortfall of the original padding, and
- Although buying the extra authentic material wouldn't have cost much, recycling and upcycling it does save a few pennies and makes a small contribution in helping to protect the environment.
Choice of Materials for Reupholstering
While I decided to re-use the red leather seat covers, instead of using original materials for the rest of the upholstery, I instead opted for the following:-
- White cotton bed sheet to replace the sacking for the under-seat dust cover.
- Axminster carpet to replace the horsehair and wool felt padding, and
Below is a more detailed description of the materials I used, and how I proceeded to do the upholstery.
Under-Seat Dust Cover
To replace the sacking I opted for an old white cotton bed sheet to act as a dust sheet under the chairs.
It serves the same purpose as the sacking did e.g. a little less unsightly than seeing the bare springs if you turned the chair upside down. Besides, in my mind, if you do happen to turn the chair over, the cotton sheet is going to look even less unsightly than traditional sacking so often used for the underside of upholstered furniture.
To fit the dust sheet I cut the white cotton bed sheet into four squares (one for each chair), large enough to wrap around the wood and, using a staple gun, staple in position, as follows.
Fold the edge over on one side of the cotton sheet square (so that it's less likely to tear, and staple in position along the top edge of the seat support.
- Pull the cotton underneath the chair to the opposite side, and while pulling it taut, wrap it around the top edge of the seat support to enable one staple in the middle to hold it in place; remember to fold the edge of the cotton sheet over for added strength.
- Working from the centre and working out, keep pulling the cotton sheet taut as you staple it in place.
- Then repeat the process for the front to back.
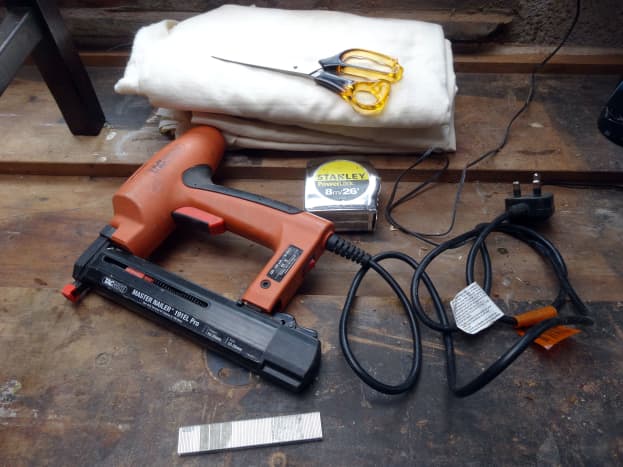


Old cotton sheet for the dust sheet cover on the underside of the chair, and the staple gun for fixing it in place.
Seat Padding Replacing the Horsehair
The original padding was in two layers, the firm horsehair to cushion against the springs, and the softer wool felt for comfort.
To replace the horsehair I opted to use spare Axminster carpet leftover from when we had an Axminster fitted in one of our bedrooms.
The reasons I chose the Axminster carpet to replace the horsehair is that it's a similar thickness to the layer of horsehair used, just as firm, and just as durable. Also, with using horsehair you need to use sacking between the horsehair and springs to keep it in place and give it some resilience from the wear and tear caused by the springs when people sit on the chair.
In using Axminster carpet, there is no need to use sacking as a protective layer as the weft and warps that the woollen carpet is weaved onto performs the same purpose as the sacking, while being stronger and more durable.
I wouldn't entertain using just any old carpet, but Wilton (established 1721) and Axminster (founded in 1755) are two renowned English Carpets made to the highest standard and very hard-wearing. While many carpets subject to heavy usage will need replacing periodically Wilton and Axminster carpets will last a lifetime.
On the underside of these carpets the weft is made from jute (a tough plant fibre) and the warps from cotton; while the wool that's weaved into the weft and warps are 100% tough wearing wool, specially selected from specific breeds of British sheep known for their quality in hard wearing wool.
To fit the Axminster carpet:
- Cut one piece of carpet to size and shape to fit the top of the seat exactly.
- Used that as a template to cut the other three pieces.
- Then secure in place with a hammer and carpet tacks.
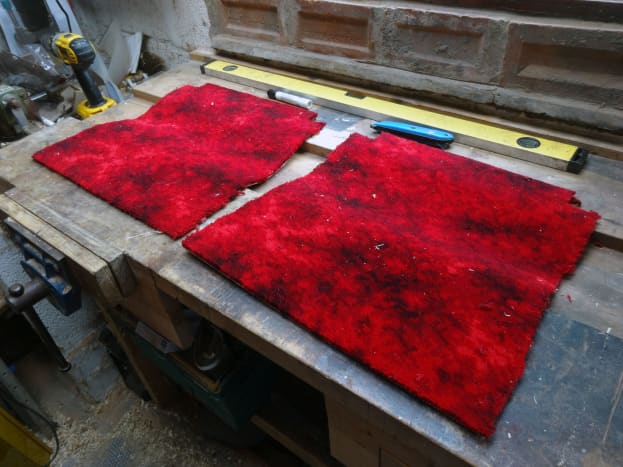
Cutting squares to fit from off cuts of an Axminster carpet used in one our bedrooms.
Seat Padding Replacing the Wool Felt
For replacing the wool felt, I initially considered using some polyester stuffing (very much like cotton wool) which we have spare from when I dismantled an old sofa that we were dumping.
The polyester stuffing would have given the same softness and comfort as the wool felt, provided it was laid thick enough; but trying to lay it evenly over the entire seat, to prevent it being lumpy, and being consistent for all four chairs, although doable, would have been a little challenging. Plus to keep it firmly in place I would have had to contain it with the cotton sheet over the top, which would have needed to be firmly stapled in place.
I did try it with one of the chairs, and although it worked quite well, and it was quite comfortable to sit on when I tacked the leather seat down on top, I wasn't totally satisfied with the result.
Therefore, after some deliberation, I opted to lay a second piece of Axminster carpet on top of the first one; specifically, because the Axminster carpet also happened to be the same general thickness to the original wool felt, and just as soft to sit on:-
As with the carpet pieces to replace the horsehair, I cut one piece to size to fit the seat exactly; but this time didn't take them down as the carpet below and the leather seat cover above would hold this layer firmly in place.
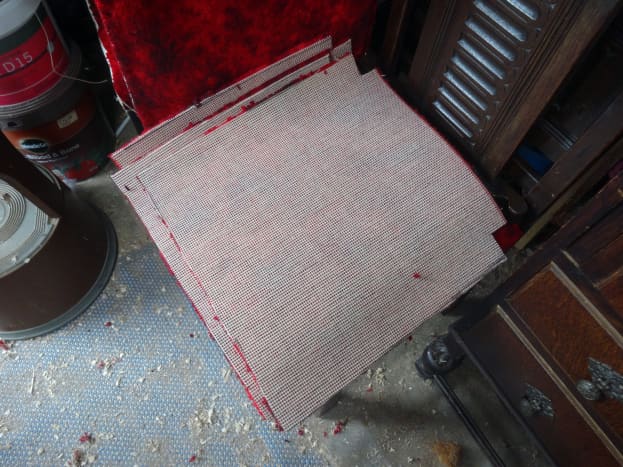


Squares cut from the Axminster carpet off cuts, ready for use; upside down and showing the weft and warps on the underside.
Red Leather Seat Cover
For the seat cover itself, I used the original red leather, which was in good condition, so that after a good clean and polish would be as good as new. Plus it's the same red leather seats as on our four dining chairs we use in the dining room, so if we do have guests and need extra chairs in the dining room, even though the two sets of chairs are different design, the red leather seat covers would be a common theme.
As they were the original covers, they were already cut to shape and size, and just needed tacking back in place with upholstery tacks. Tacking them back using the same holes made by the original upholstery tacks, and (just like fitting the dust sheet) pulling the leather taut as it's tacked down.
Chairs fully reupholstered. Just need a good clean and polish.
#10 Finishing Touches
With the chairs now reupholstered, the final phase to finish the project was:-
- Clean and polish the leather.
- Refit the manufacturer's Labels on the underside of the chairs, and
- Give the wood a final quick wax and polish with beeswax.
Cleaning and Polishing the Leather
The two products I used for cleaning and polishing the leather were:
- Saddle & Leather Conditioning Soap, and
- Leder-Balsam
From personal experience, over the years I've discovered the first product is good at cleaning leather, but it doesn't give it any sheen; whereas the Leder-Balsam gives an excellent shine to the leather.
Therefore to clean and polish the leather:
- I rubbed the Saddle & Leather Conditioning Soap with a sponge to clean it up; and then left it half an hour to dry.
- I then used another sponge to rub in the Leder-Balsam, and left that for a few minutes to soak in, and then.
- I buffed up the leather with a yellow duster to give it a nice sheen.
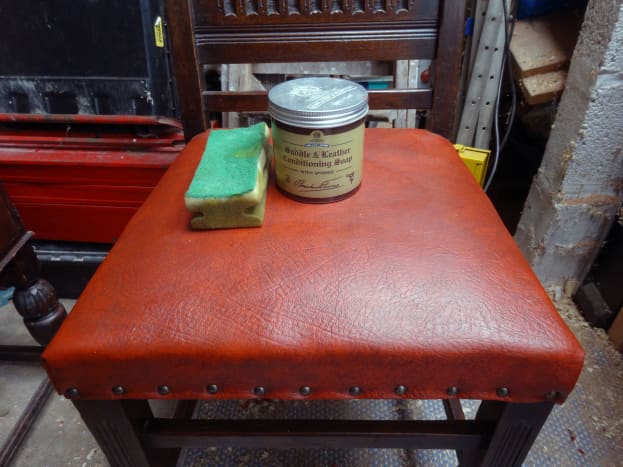
Applying the Saddle & Leather Conditioning Soap to clean the leather
Refitting the Manufacturer's Label
I simply used a couple of carpet tacks and a hammer to nail the manufacturer's label back in position on the underside of each chair.


Manufacturer's label reaffixed to the underside of the chair's seat.
Final Bees Wax Polish
And to finish off I just gave all the chairs one final quick wax and polish with the dark coloured antique bees wax polish.
Chairs completely renovated.
This content is accurate and true to the best of the author's knowledge and is not meant to substitute for formal and individualized advice from a qualified professional.
© 2019 Arthur Russ
Arthur Russ (author) from England on September 16, 2019:
Thanks Liz; yes, compared to other upholstery jobs I've done this was quite involved, but well worth it.
Liz Westwood from UK on September 16, 2019:
This looks like a big but extremely well-executed job. Your detailed account is very useful for anyone attempting a similar project.
Solid Wood Brown Polyurethane Dining Chairs Set Of 2
Source: https://dengarden.com/interior-design/Renovating-Set-of-Four-Solid-Oak-Upholstered-Seat-and-Carved-Back-Chairs


Tidak ada komentar:
Posting Komentar